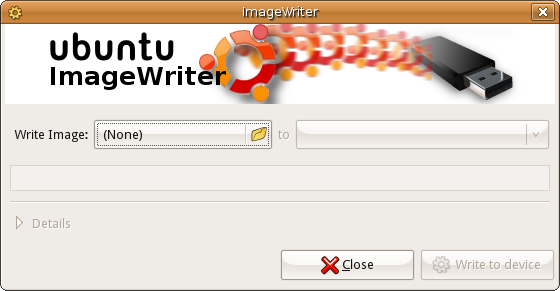
Ubuntu is distributed over the Internet as two types of files: CD image files, called ISOs, and flash image files, called IMGs. To install Ubuntu from flash media, you first need to write the downloaded IMG image to your flash device. This requires a working flash writer (e.g. USB stick, SD reader, etc.), and flash media with sufficient capacity for the install (1 GB or larger is recommended). Commonly, a single USB stick is used to fufill both requirements.
Be sure to verify that your computer supports booting from the device you selected for installation. Many computers can boot from a USB drive, and some from other sources. Check the documentation on your specific model for the procedure to boot from the selected device.
If you have downloaded a ISO image, please refer to BurningIsoHowto
The GettingUbuntu page has links to IMG and ISO image files, as well as other methods of GettingUbuntu.
MD5 Sums
Before writing your flash, it is highly recommended that you verify the md5 sum (hash) of the .img file. For instructions, please see HowToMD5SUM. For the current list of Official Ubuntu MD5 hashes, see the MD5SUMS file for the release you're using under http://releases.ubuntu.com (and optionally the PGP signatures in the MD5SUMS.gpg file), or see UbuntuHashes. This ensures that the file was not damaged during the download process and is 100% intact.
Windows
Graphical Interface
- Download the desired .img file
Download Disk Imager from https://launchpad.net/win32-image-writer/+download
- Insert your flash media
- Note the drive letter assigned to your flash media
- Start Disk Imager
- Select the downloaded file and target device, and click "Write"
- Remove your flash media when the operation is complete
Command Line Interface
- Download the desired .img file
Download flashnul from http://shounen.ru/soft/flashnul
- Attach your USB drive
Run flashnul -p
- Note the physical device number for the USB drive
Run flashnul <number obtained in prior step> -L \path\to\downloaded.img
- Answer "yes" if the selected destination device is correct
- Remove your USB drive when the command completes
Ubuntu
Graphical Interface

- Download the desired .img file
- Install the usb-imagewriter package
If your release does not include this, download it from Oliver's PPA
Open Applications -> Accessories -> Image Writer
- Insert your flash media
- Select the downloaded file and flash device, and click "Write to Device"
- Remove your device when the operation is complete
Command Line Interface
- Download the desired .img file
- Open a terminal and insert your flash media
Look at the output of dmesg | tail -20 to determine the device node assigned to your flash media (e.g. /dev/sdb)
Run sudo umount /dev/device/node
Run sudo dd if=/path/to/downloaded.img of=/dev/device/node bs=1M
- Remove your flash media when the command completes
Mac OS X
Command Line Interface
- Download the desired .img file
- Open a Terminal (under Utilities)
Run diskutil list to get the current list of devices
- Insert your flash media
Run diskutil list again and determine the device node assigned to your flash media (e.g. /dev/disk2)
Run diskutil unmountDisk /dev/device/node
Execute sudo dd if=/path/to/downloaded.img of=/dev/device/node bs=1M
- Remove your flash media when the command completes
